The challenge is to recognize hand written numbers from images. This is the famous MNIST dataset (available here), a good computer vision problem to start and practice with.
What is provided:
– A training data set: 42000 rows. Contains the “label” column.
– A test data set: 28000 rows. Does not contain the “label” column.
As indicated in the link above, each row represents a gray-scale image of a hand-drawn digit, from zero through nine. It is 28 pixels in height and 28 pixels in width, for a total of 784 pixels in total. Each pixel has a single pixel-value associated with it, indicating the lightness or darkness of that pixel, with higher numbers meaning darker. This pixel-value is an integer between 0 and 255, inclusive.
Libraries
import numpy as np
import pandas as pd
from PIL import Image
from sklearn import svm, model_selection, metrics
from sklearn.linear_model import LogisticRegression
from tensorflow import keras
import tensorflow as tf
Data preparation
Let’s load both training and test data
train = pd.read_csv("train.csv")
test = pd.read_csv("test.csv")
We can see the image behind each row in both these data sets. Here is an example of 3 random indices in the training set. Change the value of index get multiple images.
image_size = 28
index = 0
train = train[train.columns.difference(["label"],sort=False)]
first_image = train.iloc[index,:].to_numpy(dtype=np.uint8).reshape(image_size, image_size)
image = Image.fromarray(first_image)
image.show()

There isn’t much to do here to prepare data, as it is already clean. However, we separate the training set into y (the label) and x (without the label).
y = train["label"]
x = train[train.columns.difference(["label"], sort=False)]
And we also perform scaling and split the train set to get a training set and a development (cross validation set). I could have split the data into a training, cross validation and a test set. But since I won’t do hyper parameter tuning, there is no need to split the set into three sets.
x_train, x_test = x_train / 255.0, x_test / 255.0
# split into training and cv sets
x_train, x_cv, y_train, y_cv = model_selection.train_test_split(x, y, test_size=0.1, random_state=42)
Modeling
Since this is a computer vision problem, deep learning is the go-to solution. However, we will still explore simple solutions at first before moving to more complex models. We’ll then be able to compare the accuracy (or any other chosen metric) of different models.
SVM (with linear kernel)
SVM can be very slow when the training set is large. So, we will the randomized search instead of grid search for hyper parameter tuning. Also, because of both the size and the number features, we will a linear kernel.
range_c = 2. ** np.arange(-7,7,1)
param_grid = {'C': range_c}
model = model_selection.RandomizedSearchCV(svm.SVC(random_state=42, kernel="linear"), param_grid, cv=5, scoring='accuracy')
model.fit(x_train, y_train)
pred_train = model.predict(x_train)
pred_cv = model.predict(x_cv)
Shallow neural network
Let’s start with a one hidden layer neural network, so a shallow neural network. I chose the neurons number in the hidden layer to be equal to the features number / 2, so approximately 400. It could a hyper parameter to be tuned, but it may take some time, depending on which device it runs on.
model = keras.Sequential([
        keras.layers.Dense(400, activation=tf.nn.leaky_relu),
        keras.layers.Dense(10, activation="softmax")])
adam = keras.optimizers.Adam(learning_rate=0.001, beta_1=0.9, beta_2=0.999, amsgrad=False)
model.compile(optimizer=adam, loss="sparse_categorical_crossentropy", metrics=["accuracy"])
model.fit(x_train.to_numpy(), y_train.to_numpy(), validation_data=(x_cv.to_numpy(), y_cv.to_numpy()), epochs=100,verbose=True)
pred_train = np.argmax(model.predict(x_train), axis=1)
pred_cv = np.argmax(model.predict(x_cv), axis=1)
Convolution neural network
Since this a problem linked to visual imagery, we will use a convolution neural network. First, let’s reshape the data into (m=size of examples,28,28,1), 28 as we have 28 pixels and 1 as the images are in grey scale.
x_train = x_train.values.reshape(x_train.shape[0], 28, 28, 1)
x_cv = x_cv.values.reshape(x_cv.shape[0], 28, 28, 1)
The model definition I choose is highly inspired from LeNet-5 model:
– A convolution layer with 6 filters, each one of size 5*5, with no stride and valid padding.
– A max pool layer to split by half both height and width of input.
– A convolution layer with 16 filters, each one of size 5*5, with no stride and valid padding.
– A max pool layer to split by half both height and width of input.
– A succession of dense layers, the last one has a softmax activation function to correctly classify the input as a digit from 0 o 9.
model = keras.Sequential([
        keras.layers.Conv2D(filters=6, kernel_size=5, strides=1, padding='valid', activation=tf.nn.leaky_relu,
                            input_shape=(28,28,1)),
        keras.layers.MaxPool2D(pool_size=(2, 2), strides=None, padding='valid'),
        keras.layers.Conv2D(filters=16, kernel_size=5, strides=1, padding='valid', activation=tf.nn.leaky_relu),
        keras.layers.MaxPool2D(pool_size=(2, 2), strides=None, padding='valid'),
        keras.layers.Flatten(),
        keras.layers.Dense(120, activation=tf.nn.leaky_relu),
        keras.layers.Dense(84, activation=tf.nn.leaky_relu),
        keras.layers.Dense(10, activation="softmax"),
    ])
adam = keras.optimizers.Adam(learning_rate=0.001, beta_1=0.9, beta_2=0.999,
amsgrad=False)
model.compile(optimizer=adam, loss="sparse_categorical_crossentropy", metrics = ["accuracy"])
model.fit(x_train, y_train, validation_data=(x_cv, y_cv), epochs=50,verbose=True)
pred_train = np.argmax(model.predict(x_train), axis=1)
pred_cv = np.argmax(model.predict(x_cv), axis=1)
A synthesis of accuracy for the 3 models. As expected, the CNN model gives the best results. If trained a little big longer ( bigger epoch), the results are slightly better on both training and cross validation (or test) sets.
| SVM | Shallow NN | CNN | |
| Training accuracy | 0.954 | 0.997 | 0.998 |
| Test accuracy | 0.938 | 0.976 | 0.984 |
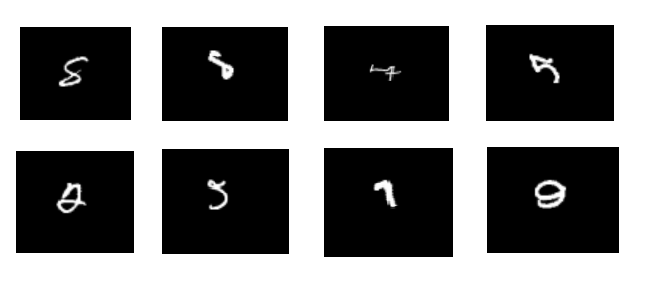
Let’s check some of the examples that the CNN miss-classified. The majority is hard to classify, even for a human.
I hope this was helpful, I know I had a lot of fun with my first computer vision problem ! It was the ideal opportunity to dive into deep learning.
Thanks for reading this post and see you soon !